Friday, December 18, 2009
The Experience!!!!
I honestly had a blast doing this project. Though, I will admit, I have never been so stressed out and frustrated in my entire life! But I loved all of my group members and we worked together pretty well. We did have some issues though, especially with communication. I was sick twice and I would send out and email asking the group to fill me in on what I missed and etc. Well, eventually one of them would get back to me, and even then stuff still was left out and the entire group never seemed to be on the same page with the little details. However, throughout everything, everyone got what they needed to done and they did a great job at it! And even though it was a very long two last days, I had fun building the project, looking back on it. I became close to some of my group members and it was also to see our be built and to actually do it myself, it was an amazing feeling when it was done! I don't think I have ever felt that accomplished in any of my other classes as I have finishing this project. I also learned great skills when it comes to interacting with different majors and I learned that I need to think of ways to word things to make sure everyone can follow me. Team management was also a great skill that I can walk away from this project with. I was the one that always sent out the team emails, coordinated meeting times, kept the budget, and worked on the papers (though that was more mandatory on my side!). It was a great experience and I hope the next class will have an even better time with it. Though I would suggest that the class has grades for prototyping or some way to make sure that they actually build things right away. This is because our group, though we had a ton of great ideas, we were a lot of talk and computer prototyping and not a lot of building and testing action was done. Not that computer prototyping is bad, but I especially learned that building is designing a concept and adjusting the project. It was very hard to prototype because of the fact that the project was CONSTANTLY changing but we really needed to build things sooner than we did. The other thing I wish we all had done was document the entire process more thoroughly using pictures. That was the one thing my group was not the greatest at, and I think it harmed our final paper and presentation. But, I know that we all worked very hard on our project and I am very proud of my teammates!
Testing, Building, and Final Project!
So, over the weeks we also tested our system and ideas and built them. Below are images of our prototyping and of me putting tubing into IV bags using a blow dryer and pliers. I put tubing in about 90 IV bags and it took me about 3 hours or so, it was a pain in the butt!


The images below are images of the final project itself. It turned out pretty much exactly how we imaged it would! However, sadly the algae did not glow as brightly as it should have due to the fact that we had transferred it to the IV bags not many hours before it was due. Also, the conditions for the algae were not great and they were hard to control in the gallery so that didn't help. Then, of course, the one major calculation that me and my other engineer had to do is make sure that the motors worked to push the acrylic and even though we thought we were making conservative calculations... we were off! The motors did not have enough torque to push the acrylic pieces!!! NO!!! O well we did try and the motors worked and the sensors worked, just not to push the pieces. But oh well, the hours we put building this thing, though FRUSTRATING as hell was a blast!


Almost there!
Along with the concept change, the form of the structure changed as well. Instead of building a wall of all equal containers buy hand, we decided that we have more money than time, so we started looking into buying containers. So, we actually decided that we were going to use iv bags for containers instead of making the boxes. The iv bags were perfect because they were already sterile, water tight, and they allowed for tubing to be easily connected to each bag. So the form changed around the iv bag idea. We wanted to protect the algae from getting over agitated by humans hitting it directly, so we wanted to build an acrylic structure to protect it. The form was designed by the architects, and it was meant to look alien like and also have a wave type form. The original design was done so that the bags would be hung off of metal frame work (think like a checker board type look with steel piping) and the acrylic would go around the bags. The bags would then be connected by tubing that would allow air and the algae to travel to and from each bag. The tubing would be rapped around the structure and go in and out, making the structure kind of like an organ with the tubing being veins. A computer image of this is shown below, my teammate David made this. 


However, this idea had many projects in one, so we decided to just focus on the algae and we redid the structure. We kept the same acrylic pattern and structure (with algae bags still in the middle of the acrylic) but we had the pieces hang just from the top of a steel pole so that they would swing freely in and out of the plane of the structure. The structure itself is now hanging from a steel pole which is supported by an I beam in the ceiling. Metal cable will travel through the steel pole then go through a bottom steel pole then will be bolted to the floor for support. Then it was decided that, in order to make the algae glow do to human agitation, a motor would be placed below each acrylic piece with a acrylic "finger" so that when the motor was activated the finger would spin and hit the acrylic pieces causing it to swing in and out of the project plane. This will cause the algae to agitate and glow. The motors will be connected by infrared censors that will turn on the motors anytime a person walks by. The motors will work so that the acyclic pieces will be hit one by one and will create a wave within the structure. Below is another computer image created by David that was for our final structure.

Slight change of plans
After researching algae farms in more detail, the decision was made that are project could not actually be an algae farm because the amount of algae needed to produce usable biofuel is an extremely large amount. This amount is much larger than a 8x9 foot algae farm could produce, seeing as an actual algae farm was built in Texas by an Arizona company called PetroSun Biofuels, contains 1,100 acre network of saltwater ponds with an additional 20 arces dedicated to research and development of the biofuel itself. So, in order to adapt our project to this change we decided to make the focus of the entire project to be an off the grid light source, instead of both biofuel and a light source. So, to do this we really needed to figure out exactly how the algae worked. After some research and Allison's experience playing algae mom, we figured out and understood how the algae worked. This algae are unicellular algae that run on a biological clock that splits the day into 12 hours of sunlight and 12 hours of night. During the 12 day light hours, the algae produce oxygen and sugars using photosynthesis, meaning they do not have to be fed. During the 12 night hours, the cells produce chemicals (which are connected to the day time photosynthesis) that will cause the luminescent reaction. The reaction will occur whenever the algae are agitated and it will give off a soft light blue light. Changes in the biological clock can be made by training the algae to think that different chunks of the day are sunlight and night hours. This can be done using ordinary lights and every day moving when the algae starts it’s day and night cycle by one hour. For our final project, we decided to do this training so that the algae’s day cycle occurs between 9am and 9pm, so that the project can be seen glowing during the daytime presentation. However, in real world applications, the algae’s biological clock would run according to sunrise/set like normal so that it will glow in the dark and can be used for light. The algae need to be kept at a warm temperature, between 50 and 70°F, and need to be kept in a salt water conditions. Our project also changed in the fact that we were know longer going to use solar panels to power our air pumps and any other interaction systems. We found out that our project was going to be held in a potentially windowless gallery and sense the focus of our project was the algae and not the solar panels, we decided to remove them from the project. Also, we decided that the algae would be agitated using human interaction using an arduino board and sensors, however the way was not 100% known yet. The image below is an image of the algae actually glowing.

The next image is of an actual algae cell.

Algae Farm
After further research, we realized that using algae in our project as actual biofuel was never going to work, the technology does not exist in a truly usable form yet to pull this off. So, even though this first plan was not feasible for our project, we still decided we wanted to work with algae and have our project be heliotropic in the sense that the algae goes through photosynthesis, thus running off of the sunlight. So, we decided that if we couldn't actually use algae for biofuel, we could try to bring the idea of biofuels out to the public. To do this, we actually wanted to have a visually pleasing array set up that could grow two specific strands of algae, one used to make biofuel and one type that was bioluminescent (Pyrocystis Fusiformis), or a algae farm. This array would be put on the sides of buildings so that people could see it and interact with it and learn about biofuels. The array was inspired by Steve Pikes, an architect that designed an architectural array that had containers of bacteria and mold growing in the array. We took that idea but replaced it with algae so that during the day the algae will grow and people can interact with it and at night the bioluminescent algae would glow and act as an off the grid light source. The algae would only glow, however, when it was agitated so it was going to be worked out so that people could interact with this algae farm and cause the algae to glow. Both types of algae will be able to be harvested so that the containers can be kept clean and so that the algae can be used for fuel and for light. The figure below is an example of a biofuel/bioalgae farm that is being grown in the Venice cannals right now. 


This next image if a conceptual image of our project idea. The algae would be mixed randomly in the array, some containers with the biofuel algae and some with the bioluminescent algae. In the image, the algae containers are the larger blue squares. The smaller black squares were solar panels that we were going to use to power the air pumps needed to keep the algae alive.

The last image is a 3D rendering of the project as if it was glowing at night.

Wednesday, December 16, 2009
Introducing the Algae Powered Robot!!!!!!
The next meeting, my group started from scratch and redid our goals and just started throwing out ideas without turning any down. The first decision that was made (with me being VERY reluctant to the idea, but I had no real argument to fight it so whatever) was that our group wanted to use solar energy in a more natural way and not using solar cells to convert it into electricity. What this meant was, we wanted to use algae in our project.... it sounds very bold I know and that's why I was very skeptically at first. Especially because we were talking about using it as a biofuel source for our project idea, which was through a crazy chain of events, a robot. I have pictures of our board when we were brainstorming below


The last image was a concept drawing of how we could do this/build this robot. The next one below is a concept drawing of how we could have taken an hydrogen fuel engine from a toy car engine that already had this technology built into it. We were hoping we could adapt it into our robot to make it hydrogen fueled from the algae.

The next two pictures are concept drawings that were done by my team members.

I loved the concept and everything, but of course (this is VERY understandable) the idea got shot down... shocking! :) Then of course, sense all of the groups projects were not what they were looking for, the professors sent out and email re-establishing what the project was and what they were looking for. So once again our group was back to square one.
Final Project: Group 3 and our first idea
So of course, I failed once again to stay updated with my blogs. Its hard to catch up when your sick and other work becomes top priority! But, I will start from the beginning for the final project description. I really liked all of my group members from day one, even though one of them had made a joke to the entire class about switching out of groups, that made me a little nervous. But, when we were discussing the project, we were all pretty much on the same page, we wanted to build something that would help people. Though my group really wanted to do it in a urban setting, which was not my thing, and it had to incorporate spacial in a new and different way (for lack of a better explanation, maybe be incorporated into a already existing structure or space, I am still not 100% on the original goal there!). The first day that we met, we didn't actually conclude on what we were going to do, but (I cant remember exactly WHY we decided this) we did decide we wanted to work with water and do some sort of water purification. Now, at the time this seemed like a great idea! And we wanted to do it on really polluted rivers, like in Chicago or Detroit or etc. (though I am actually not 100% sure how bad they are, but the idea was to work somewhere close to home). The next meeting we actually designed a system (conceptually) to put at the edge of a park area and have it pull water out of the river running through Ann Arbor. This system was going to be have natural materials to try to filter the river water into drinking water and it was going to be clear so that it could also be used as a learning tool for people. It was also going to be interactive because it was going to allow people to purify their own drinking water by pushing buttons, or interacting with a light game some how, or many other crazy ways that we were thinking of. And this was going to be done in a decent size spacial array so that people could walk through it and see other people and so on and so forth (as you can tell, now that I look back on the idea, its pretty ridiculous!). And we were going to keep solar energy and heliotropism in the picture by having all of the extras be powered by solar panels and by potentially having algae in the filtration system (as you will find out algae concepts started early in this group, if I am remembering correctly). Of course, when we pitched this idea to the class and the professors, lets just say the idea didn't go over very well. But none of the other groups really had anything feasible to show the professors, so we decided to give it another shot, and actually incorporating heliotropism, the arduino boards, and the digital media that we learned how to use. This, of course, was highly suggested by the professors! So, it was back to the drawing board for group 3.
Thursday, November 5, 2009
Task 4: An Overdue Somewhat Short Summary
To begin with, I just wanted to say that I have been terrible at blogging. To be honest, I can't stand it. I won't shut up in person, but tell me to write what I have been doing and how I feel, and I draw a blank. Its hard to write experiences when I have spent the last 3 1/2 years learning how to write technical papers. Then I just got so far behind on my blogs that I knew I would have to set aside time to get caught up before I could blog on current topics, so here is my last huge blog post to catch up to where I am currently at. I promise to blog at least once a week here on out!


Well, once we had our final idea, we decided the interaction with people walking through the cube would be to have the cube light up then fade away as the people walked on through the field, creating a trail of light behind them as they went. We decided to do this using infrared sensors that work using a yes or no response. However, this yes or no response that sensor receives only allowed an LED to turn on if a person was in front of the sensor and of if there wasn't movement after a certain amount of time (I found the code online in order to make that work). My group, however, really wanted the lights to fade, not all at once either, but across the side of the cube! This issue with that was that 1.) I was in a really bad mood that week and was being extra hard to work with and 2.) I was the one person suck with the coding and system work for these lights, which I stink at! So, after hours of working on this code and fighting with one of my team members specifically, I asked a friend in my MSE class for help (he is taking programing classes). And, sure enough, we got a working code! I had the base of the code right and he help me workout the details.. The video below shows the first time we got the sensorand lights to work!
For my fourth project in this class, we were given a more open ended task that was basically making a smart surface that was also heliotropic (I honestly don't remember the exact parameters! Oops!)... however, this was easier said than done. To begin with, I was switched out of my group to a group with all boys! It was to make the group more diverse and I was all for it. And they had a lot of great ideas... the one idea we ran with was making a solar paneled building (or siding for a building) that during the day would collect solar energy and at night it would interact with people walking by. To make a LONG story short, when presenting our idea to the class, it was demolished! We were definitely not cut any slack as everyone ripped into the idea with no mercy! True, I am over exaggerating just a tad.. but that's what it felt like. I mean, I kind of new the idea was a tad crazy, even on a scaled down version we wanted to built, but I figured why not try it. Well, we were sent back to the drawing board, where I became stubborn and kind of mean in all honesty. This had nothing to do with my group members, I just felt like every idea that was thrown out was a art project, and I wanted to do something with a purpose. Plus, I was just having a bad week! Well after debating on ideas, our group finally agreed on a field of cubes that, when people walked by, would interact with them using LEDs. Now, we were just building one cube, but using digital project, we were going to demonstrate a field of cubes of a variety of sizes that would be placed on the Central Campus Diag so that it would force people to interact in a different way. During the day, the cubes would be more of an installation and would be great to look at and the sun would charge the batteries used to power the aurdinos inside the cube. At night, lights would go off as people walked by them. Below our some pictures (sorry about the quality, they were taken on my phone) of our original boards/idea.


Well, once we had our final idea, we decided the interaction with people walking through the cube would be to have the cube light up then fade away as the people walked on through the field, creating a trail of light behind them as they went. We decided to do this using infrared sensors that work using a yes or no response. However, this yes or no response that sensor receives only allowed an LED to turn on if a person was in front of the sensor and of if there wasn't movement after a certain amount of time (I found the code online in order to make that work). My group, however, really wanted the lights to fade, not all at once either, but across the side of the cube! This issue with that was that 1.) I was in a really bad mood that week and was being extra hard to work with and 2.) I was the one person suck with the coding and system work for these lights, which I stink at! So, after hours of working on this code and fighting with one of my team members specifically, I asked a friend in my MSE class for help (he is taking programing classes). And, sure enough, we got a working code! I had the base of the code right and he help me workout the details.. The video below shows the first time we got the sensorand lights to work!
So after that, I had to build four (well three if you don't count the one above) different circuits to put in our cube so that each side of the cube would like up with the infrared sensors. So, I spend HOURS finding the best resistors to use for the circuits (the ones that would allow the LEDs to be the brightest) and finding enough LEDs to use for each of the same color (we used six LEDs for each side for three of the sides and 12 smaller LEDs in parallel for one side). Once all that was done it was time to put the whole thing together as a group! The frame of the cube was cut and painted wood, and the sides of our cube were made out of acrylic that had different laser cut designs on each side that would pick up the light from the LEDs. Also, one side of our cube (the green side) was actullay powered using solar cells that charged the battery!! The other three sides we had to use normal batteries due to lack of solar panels. We spent hours the night before assembling everything, but all and all our project turned out great! And we had excellent digital project work to back up our prototype design. Below is a video of our final working cube, sorry the camera was so shaky!
Our group honestly click together the best during the final stage of putting the cube together! We had a lot of fun doing it and we all got along really well and it seemed like any tension in the group that had existed disappeared! I apologized for my grumpy and catty demeanor and two of the group member whole sent out an email to the group complaining how no one else was working on the project (which was not true!) definitely realized their mistake! So in the end I learned two things, first try not to let the stress and pressure of developing a more open ended project cause to much turbulence in the team. Productive disagreements are good, but try not to argue and let emotions get in the way, it only harms the team. Secondly, I learned that I cannot let me mood or personal life effect my behavior towards my teammates or the project. If I am in a bad mood before a meeting, that is no reason to argue about pointless facts, be short with teammates, or give up on something that seams hard before you have really even tried.
Thursday, October 8, 2009
Heleotropic Project
At our next group meeting, we decided the we wanted our project to be programed to follow the sun, instead of tracking sunlight, in order to be more efficent. The reasoning behind this was that if we already know the suns travel path for everyday of the year (and every season) it would save more energy to just follow the known, never changing path of the sun than to program the machine to follow the light, which could become distracted by clouds and etc. We decided that we would cover all of the angles and distances that the machine needed to travel by putting tubes in two parallel planes where the top plane controlled movement in the y-axis direction and the bottom plane controlled the x-dircetion of movement. The two planes would move simultaneously to cover all of the angles needed. The next meeting we drew a diagram for the frame work and moving planes for our project and worked out all of the dimensions needed to build gears and that will allow us to reach all of our desired angles. Below shows our final sketch of our project.


After that meeting, we started building our final project by laser cutting acrylic to make the entire body, the frames. two planes, and the gears used to move the planes. The two flat planes where made by weaving metal wire through the acrylic frame so that the two planes had square grids on them, which were slightly misaligned. This was so that the tubes that would be collecting the sunlight could sit on the bottom grid and move freely. Our idea was that the tubes, for real use, would have fiber optic wires in them that would allow the collected sunlight to travel through the tubes and be focused onto a solar panel below. The wire mess second plane would allow for the wires to come out of the bottom of the tubes and the tubes would still be free moving. Images of the final built project are below. They show the top and bottom planes, the gear system with the servos used to move them attached, and the entire body of the project. The image quality is bad due to the fact that I took these on my phone.


Our group also made a Digital Project version of our idea, but enhanced the idea by making sure the tubes in the system never over shadowed each other. Meaning that as the tubes rotate and follow the sun, the tubes in the back row (farthest away from the sun) will actually be the tallest and the rows will decrease in height to make a flat plane that places the sun, thus eliminating shadows and optimizing light harvesting. Plus throughout the day the tubes will create a wave motion ontop of a building, or where ever the system is used. Our group wanted to use this system for urban projects, that's why we tried to bring a visual aspect to our project as well.
Wednesday, September 30, 2009
Third Class
For week three, we focused our class period on learning to use Digital Project, which is a 3D modeling program. This class was very interesting, though at some points moved a little to fast for me to keep up, but was very useful. Our professor also put tutorials online so that if we missed something in class we have a reference to go back to, which is extremely useful. We then were divided, once again, into new groups of six and were assigned to make another heliotropic design using the arduino boards and circuts, however, this time we needed to make it follow the sun and we also had to make a Digital Project version of our design. The physical arduino design has to be made up of three light collecting cells that follow the sun, while the Digital Project design had to be more of a full version of our physical project, they do not have to be exactly the same, the ardiuno prototype just has to be simliar to our final idea. We met in our groups after class and my group right away started tossing out ideas for our project. Our meeting went very well and we were all happy with our main ideas that we came up with and what direction we wanted to take our project.
Tuesday, September 29, 2009
Completing Homework 2: Both group meetings
So for our first group meeting, my entire group got together and for the first 10 to 15 minutes and made sure we were all on the same page of what we wanted to do for our project and how is was going to work. We decided to scrap our original idea completely and go with a ball socket idea where two servos were taped together and acted like a joint to cover the x-axis and y-axis, so that no matter were the light was, our design could follow it. We decided to build a triangular face to put the LDRs on and did one in each corner of the equilateral triangle. We soldered longer wires onto the LDRs so that the LDRs could be punched through the cardboard face and far away from the arduino and other circuits. Then, we attached the base of our project to the servo motors and then the servo motors to a box that contained all of the wires and circuits. We were having trouble getting our project to work, it would basically shake back and forth, like it was "seizing". We decided, for simplicity, to used two arduino boards and connect one LDR to one board and the other two to the other board. However, the system was still having problems and would not work properly, but would for a pattern in it's movement. We played around with the program multiple times, trying the most basic code, like the one showed in class, to complicated editions to that code to try to fix our problem, but nothing was working. So, we decided to call it a day and come back to our project the next day. The picture below just shows how much "fun" my group was having trying to get our project to work!

The first solution we tried at our next meeting was to add another LDR in the "middle" of our face. However, we still were getting a repeating patter from the motors that did not follow the light. After playing with every LDR to make sure they worked, all the motors and circuits, and the codes themselves, we realized that we had written our code to work with the computer by transferring values back and forth from the arduino to the computer and vice versa. The problem was that we forgot this when we were trying to get our machine to work and were unplugging both arduinos from the computer and just using the external plugs for power. So, once we used both the computer and the external power source, our project worked perfectly! Me and another team member stayed a little late after that meeting to try to put lights on our face but had no luck, seeing as it was extremely late and we no longer had the patience to work on it. We did, however, make the LDRs more centered in the middle of the face and closer together. We now were using four LDRs in the center of the face (like a diamond) where the top and bottom LDRs caused y-axis movement, while the left and right LDRs cause x-axis movement. Our project apparently (had to miss the demistration due to another class) worked extremely well and we were all decently happy with our final design. Though, if we had figured out our issues with our system earlier, we would have tried to make it more flashy by adding lights or etc. Below is a picture of our final project.


The first solution we tried at our next meeting was to add another LDR in the "middle" of our face. However, we still were getting a repeating patter from the motors that did not follow the light. After playing with every LDR to make sure they worked, all the motors and circuits, and the codes themselves, we realized that we had written our code to work with the computer by transferring values back and forth from the arduino to the computer and vice versa. The problem was that we forgot this when we were trying to get our machine to work and were unplugging both arduinos from the computer and just using the external plugs for power. So, once we used both the computer and the external power source, our project worked perfectly! Me and another team member stayed a little late after that meeting to try to put lights on our face but had no luck, seeing as it was extremely late and we no longer had the patience to work on it. We did, however, make the LDRs more centered in the middle of the face and closer together. We now were using four LDRs in the center of the face (like a diamond) where the top and bottom LDRs caused y-axis movement, while the left and right LDRs cause x-axis movement. Our project apparently (had to miss the demistration due to another class) worked extremely well and we were all decently happy with our final design. Though, if we had figured out our issues with our system earlier, we would have tried to make it more flashy by adding lights or etc. Below is a picture of our final project.

Second Day of Class
The second day of class was interesting. Some of us got to show off our arduino homework assignments (many of which I felt were much better than mine!) then we learned about heliotropic properties and systems, which was quite interesting. We also got to play around with our arduino systems to build different circuits that could, with use of a LDR, detect light and it's intensity, run a manually controlled motor, and could run a servo. Using these new circuits and arduino programs (which were prewriten) we were divided up into new groups and assigned a project that would be heliotropic; meaning it would find and follow light. I liked everyone in my new group, however, we had a bit of a communication problem. No one was really on the same page when we started building our final project because we didn't spend much time on the planning phase due to only having an hour or so to complete the whole project. We also had group members cutting each other off either to say something wouldn't work, to ask a question before the person was done talking, or to try to explain something before a group member was done asking a question. Our final class project worked to an extent (better than the other groups if I am remembering correctly) but it was not what all of us had in mind and still did not work well. We had tried to design it (indirectly) like a sun dial, that when the light was focus on a specific LDR in one of three quadrants, the servo would spin and arrow to point to where the light was at. It was a good idea and was different from what the other groups did but wasn't great. Once our assignment got extended to finish the project but the next class, we decided that at our first meeting we would all try to get on the same page for how we really wanted our project to work and to look and go from there.
Thursday, September 17, 2009
ARDUINO!!!
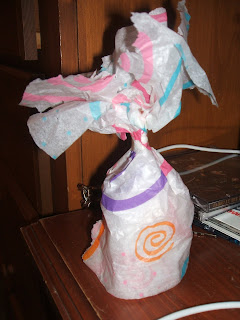
I some how managed to not only program the aduino, but I managed not to break it or my computer as well! It was not as bad as I thought it would be, was easy once I figured out a couple of little things. It was fun though and it makes me excited for the rest of the class. The picture above is my cover for my LED lights and I have also posted a video of my final HW #1 assignment.
Monday, September 14, 2009
First day of class!
We had are first day of class on 9/11. We had a quick intro lecture and an explanation of the class and our task of the day. Once we got in our group, we quickly started coming up with ideas, however, we were not really writing down every idea that we had. We also were using a long piece of paper to write down some of our ideas, which was very difficult for everyone to read. Then, we were going idea by idea and doing pros and cons, kind of shooting down ideas as we went. Our professor came to talk to us and we decided that we were not going to do any cons for our new ideas, and we were going to write down an idea for every piece of material given to us to use. Also, instead of using the piece of paper, we wrote everything on the white board so that everyone could see. We all worked together and did pros and cons and decided that for our project we would make a funnel system that would filter sand into four different boxes, in hopefully the right proportions. The way the sand got into the funnel through the use of a sling-shot type contraption where we put a cup of sand in a rubber band. The rubber band was attached to a metal pole and then the cup of sand was shot into the funnel. My group worked very well together and had a great time working on the project. We laughed the entire time and joked around and were excited about our ideas. However, though we had fun, we managed to stay focused on the task and got what we wanted to achieve finished. All of the groups projects were impressive and I think everyone took away lessons about how to deal with the other students and I now have a better idea of how non-engineering students work, think, and see things. Next task, homework one!
Subscribe to:
Posts (Atom)